Showing posts with label cake. Show all posts

Monday, August 29, 2011

Blue Velvet Cake

I know it's been done before, but blue velvet is just as impressive as red velvet. The richness of flavor from the buttermilk in combination with a slight hint of cocoa is unmistakable. Delicious.

Blue velvet cake with fading layers.
I made this cake for my brother and sister-in- law's going away party.  I made each layer a different shade of blue so that each slice had layers that faded from light to dark. It was pretty impressive. To achieve this look all I did was weigh out the batter evenly into 4 different cake pans, adding more royal blue food color gel to each pan. Each pan baked up perfectly flat, skinny, blue layers ready to be stacked and frosted with lots of smooth Swiss meringue buttercream- yum!

Blue velvet layers before baking.


Blue velvet layers after baking.
Blue velvet cake frosted in Swiss meringue buttercream.


Friday, June 17, 2011

Pillow Cake

First attempt at a pillow cake.
I've noticed that pillow cakes have become somewhat of a trend over the past few years. They're always so ornate, detailed, and pretty. It's really just cake that is either carved or baked into the shape of a pillow. Once it is decorated though, it truly does look like a stack of plush pillows.


The first time I saw one, my thoughts were 1. how does the fondant not just fall off of the cake (the picture I saw had a different color fondant on the bottom side of the pillow), and 2. how are they assembled so that the tiers are steady? I tried it on a cake for a class that wasn't for anyone, just in case there were some issues. Luckily, there were none! It turned out beautifully, and although there are some flaws in my embossing and the way I tucked the fondant underneath, this cake always gets people's attention.


I can't wait until the next time I do a cake like this now that I really have it figured out. The fondant doesn't fall off because it's draped over the top and tucked under, and the construction is steady because you stack pillow cakes the same way a regular tiered cake is staked, just with a smaller base.

Tiara topper is an actual hairpiece that was never used!

Thursday, May 5, 2011

Addison's 4th Birthday Cakes

For this little lady's fourth birthday she celebrated with two parites: one with her friends and one with her family. I had the wonderful opportunity of making both of her birthday cakes. Better yet, the colors were pink and green, one of my favorite combinations, and the parties were strawberry themed. 

Birthday party with friends cake.

Birthday party with family cake.
The first cake was a teeny cake (for a tiered cake of course) because there were only a few party guests. The bottom tier was a 6 inch 3 layer cake, while the top tier was only a 4 inch 3 layer cake. I used white cake and filled the layers with white chocolate mousse and fresh sliced strawberries. After stacking the tiers and frosting them up with vanilla buttercream, I piped all of the swirls and stripes finishing it off with mini candy strawberries I made out of color flow icing. The topper was 3 hand dipped white chocolate covered strawberries rolled in pink sanding sugars. The end result was perfect for a small party.


Addison's second birthday cake for her family party was similar to the first, but still different. I wanted her to be surprised again. I didn't want her to see this cake I had spent hours working on only to think, "It's the same as last time." She probably wouldn't have cared much because cake is cake, but to me it had to be special.


I used the pink and green again, but this time the cake was much bolder in color. I loved it. I was also able to use the same color flow icing strawberries I made for the first cake, and they still had matched well.

One obvious change besides the color was the piping. I did paisley on the bottom tier this time around. It's so girly and cute. (Just like Miss Addison.) I love the way it turned out on this cake. 


This cake was slightly larger with a 8 inch 4 layer bottom tier and a 6 inch 4 layer top tier. The cake was alternating layers of vanilla and milk chocolate cakes filled with vanilla buttercream.

Classic. Simple. Delicious. Appeals to most everyone. 


I kept the topper the same just because it's cute and fits perfectly with the theme. 


Monday, April 11, 2011

Chloe's First Birthday Party

What better theme for a little one's first birthday party than Sesame Street? Love it. I also loved the way her cake turned out, and I think she did too.

Sesame Street first birthday.
Sesame Street Birthday Cake
Three tiers iced in vanilla buttercream and covered in homemade marshmallow fondant. Each tier was a different flavor. Bottom (10") tier is chocolate cake, middle tier (8") is confetti sprinkle cake, and top tier (6") is dark chocolate cake.

Elmo Smash Cake

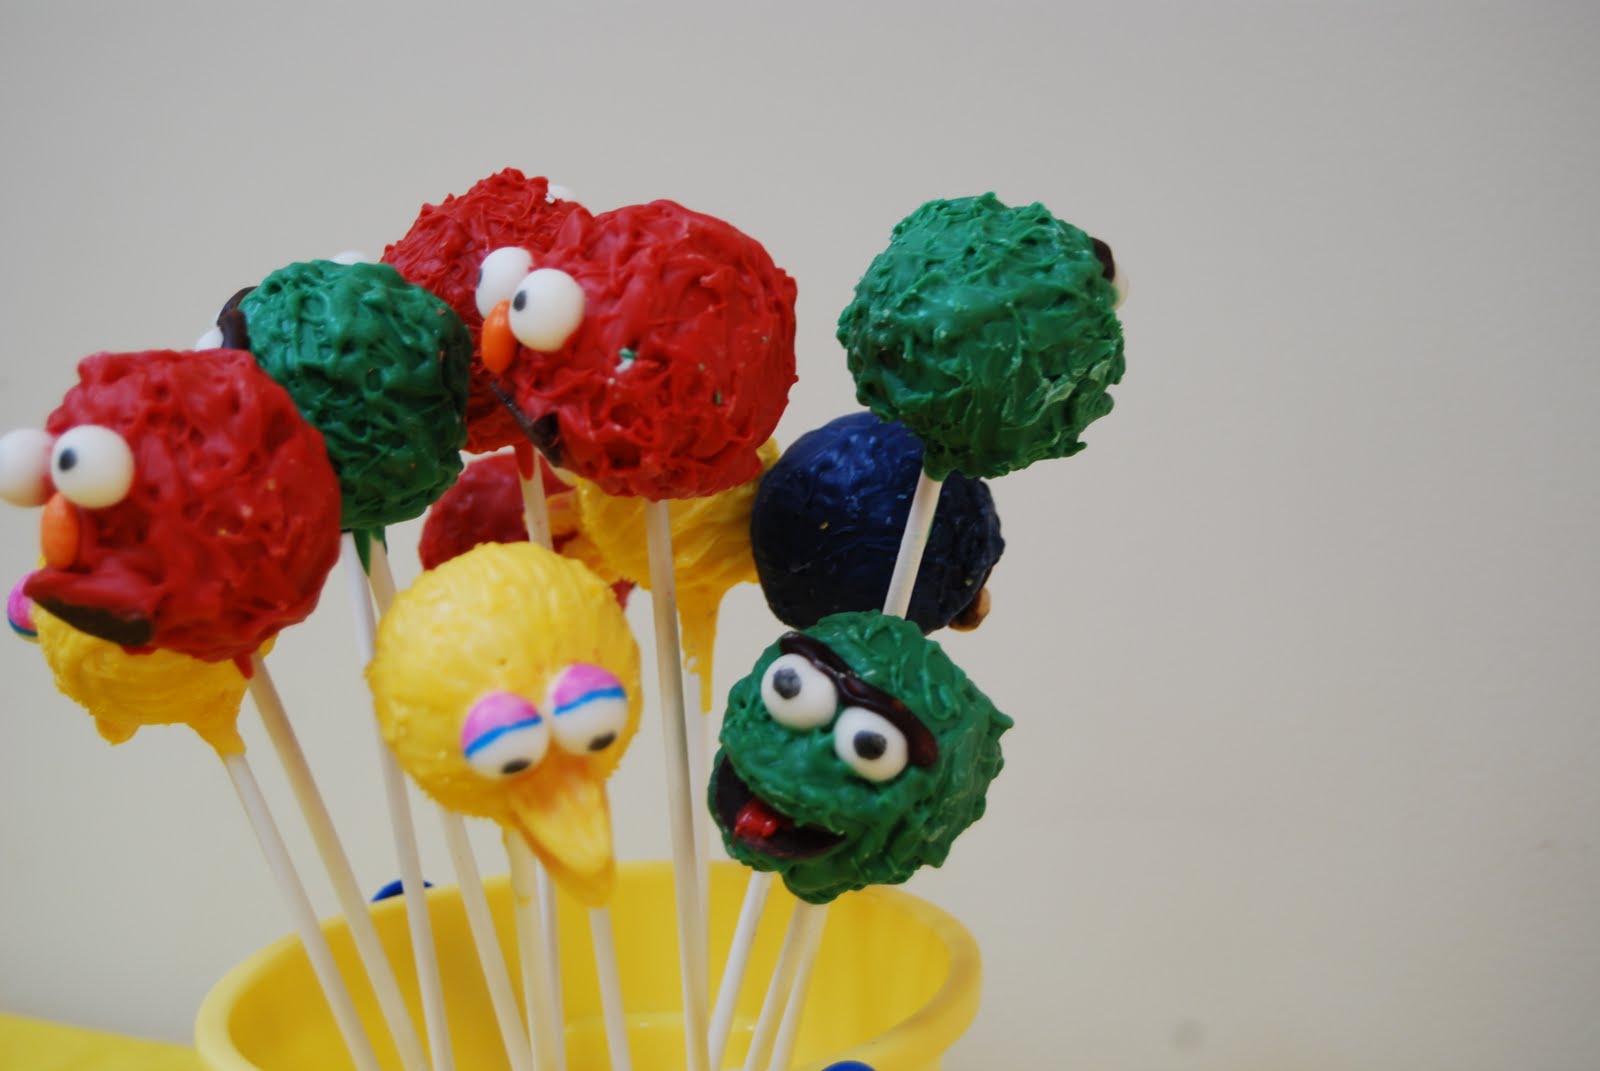
In addition to the birthday cake, I made my very first attempt at cake pops- the wildly popular bite size pieces of cake on a lollipop stick and dipped in chocolate- yes please! I used Bakerella's recipe and tutorial when making these and they turned out great!

Elmo
Oscar


Cookie Monster

Big Bird


The kids loved them, the adults loved them, and many people almost didn't believe they were edible.

Time for the smash cake


Happy Birthday Chloe, can't wait for next year!

Thursday, March 31, 2011

Hannah's 9th Birthday Cake

Hannah is the eldest daughter of some friends of mine and Brian's from church. For her 9th birthday I was able to make her cake, and I was told that she loves pink. Recent inspiration came from a photo I saw of three dark brown colored cakes with bright flowers on top. They were gorgeous, and to me pink and brown is a perfect combination.


The cake was a white cake filled with chocolate mousse and covered in chocolate ganache- yum! The lilies were made out of royal icing. I also dyed the cake layers two different shades of pink and swirled them together, it baked up perfectly.

White cake dyed pink after baking.
Leveled cake layer.

Sunday, March 13, 2011

Carrot Cake

My family loves the carrot cake from the restaurant J.Alexanders.

It's seriously the bomb.

My husband and I have talked about what foods and places we'd pick to talk about if we were Food Network stars appearing on the show "The Best Thing I Ever Ate". (It's okay. I know that's kind of nerdy...) Well J.Alexanders's carrot cake is by far the BEST carrot cake we've ever eaten. Ever. One slice is huge- like the size of a brick. It's so moist and dense filled with walnuts, coconut, raisins, spices, and of course carrots. It's served warm and has this thick cream cheese glaze over the top.

All that to say, this weekend I did some research into carrot cakes. What are ways to make them moist, what are common ingredients, and how to make the best cream cheese icing. On Sunday afternoon my husband Brian, my sister-in-law Sarah, and I threw on our aprons and baked a carrot cake inspired by the epitome of all carrot cakes from J.Alexanders. I mean, it was kind of a daunting task. Our carrot cake luckily turned out to be amazing. While it's not exactly the same as J.Alexanders, we think it's a pretty close second.


Our carrot cake is full of plump golden raisins, toasty walnuts, sweet carrots, coconut, and pineapple, and flavored with cinnamon, nutmeg, and ginger. After it is baked, it is brushed with an orange-clove infused simple syrup for extra moistness. To finish it off, each slice is given a generous dollop of cream cheese icing that just melts over the top when the cake is hot. I hope you and your family enjoy.


The Brown Family Carrot Cake
Makes 2 8x8x2 inch cake layers
Serves 18

Cake:
  • 1 cup boiling water
  • 1/2 cup golden raisins
  • 2 1/2 cups all-purpose flour
  • 2 teaspoons baking poowder
  • 1 teaspoon baking soda
  • 1/4 teaspoon kosher salt
  • 1 1/2 teaspoons ground cinnamon
  • 1/2 teaspoon ground nutmeg
  • 1/4 teaspoon ground ginger
  • 4 eggs
  • 1 cup granulated sugar
  • 1/2 cup light brown sugar
  • 1 cup oil
  • 2 teaspoons pure vanilla extract
  • 1 cup chopped walnuts, lightly toasted
  • 1 cup shredded coconut
  • 1/2 cup crushed pineapple, drained
  • 2 1/2 cups grated carrot
Preheat oven to 350 degrees F.
1. Allow the golden raisins to soak in the boiling water for about 20 minutes.
2. Sift together the flour, baking powder, baking soda, salt, cinnamon, nutmeg, and ginger.
3.  Using a mixer, mix together the eggs, granulated sugar, and brown sugar for about 2-3 minutes. Add vanilla extract. While mixing, slowly stream in the oil until well combined.  Add the flour and spice mixture in 3 batches, making sure not to over mix. Over mixing the dry ingredients into the wet ingredients will cause the cake to become tough.
4. Gently fold in each of the remaining ingredients using a rubber spatula- walnuts, coconut, pineapple, carrot, and the drained golden raisins which will now be very plump.
5. Divide the batter between two 8x8x2 inch cake pans and bake for 25-30 minutes until a toothpick inserted into the center of the cake comes out clean.
6. Immediately after the cake is done, poke several holes in the top using a toothpick.  Use a pastry brush to liberally brush the orange-clove simple syrup (directions below) over the top of the hot cakes.
7. Cut each cake into about 9 pieces and top each with the cream cheese icing (directions below) just before serving.

Simple Syrup:
  • 1/2 cup water
  • 1/2 cup granulated sugar
  • 4 inch peel of orange
  • 4 whole cloves
1. Using a vegetable peeler, peel of a 4 inch strip of the zest of an orange. Poke 4 holes in the strip using a toothpick and stick 1 clove in each hole.
2. Bring the sugar and water to a boil in a small saucepan. The mixture should be clear.
3. Remove the simple syrup from the heat and drop the orange zest strip in the syrup. Allow the mixture to cool while the orange and clove infuse the syrup. Remove the zest strips before use.


Cream Cheese Icing:
  • 1/4 cup (4 tablespoons) unsalted butter, softened
  • 8 ounces cream cheese, softened
  • 5 tablespoons milk
  • 2 t. vanilla extract
  • 1/4 teaspoon lemon zest
  • 2 cups confectioners sugar

1. Using a mixer, mix the butter and cream cheese until smooth. Add the milk and vanilla extract and once again mix until smooth. Add the lemon zest.
2. Mix the sugar into the cream cheese mixture in 3 small batches until smooth and creamy.
3. Keep refrigerated when not in use.